 The Summerville HVAC Maintenance Checklist That Prevents 90% of Repairs
Regular HVAC maintenance prevents up to 90% of common repairs and extends system lifespan by 5-7 years. Summerville homeowners should perform monthly tasks (filter checks, vent clearing, thermostat monitoring), seasonal tasks (condensate drain treatment, outdoor unit cleaning, refrigerant line inspection), and schedule professional tune-ups twice yearly—in spring before cooling season and fall before heating season. The Lowcountry’s extreme humidity, extended cooling season, and airborne particulates demand more frequent maintenance than national guidelines suggest. A well-maintained system runs more efficiently, breaks down less often, and keeps your home comfortable year-round.
Introduction: The Cheapest Repair Is the One You Never Need
Here’s a number that should get your attention: 90%.
That’s the percentage of HVAC repairs that could have been prevented with proper maintenance. Nine out of ten service calls we make in Summerville are for problems that didn’t have to happen.
Clogged filters that caused compressors to overheat. Condensate drains that backed up and flooded ceilings. Capacitors that failed because coils were too dirty to dissipate heat. Refrigerant leaks that started as minor corrosion nobody caught.
Every one of these repairs cost the homeowner hundreds—sometimes thousands—of dollars. And every one of them was preventable.
At Coastal Carolina Comfort, we’ve maintained HVAC systems across the Lowcountry for over a decade. We’ve seen what neglect does to equipment in our climate. We’ve also seen homeowners who follow a simple maintenance routine go 10+ years without a single major repair.
This guide gives you that routine. It’s specifically designed for Summerville’s climate—not generic advice written for somewhere with mild summers and low humidity. Follow this checklist, and you’ll dramatically reduce your repair bills, extend your system’s life, and stay comfortable no matter what the Lowcountry weather throws at you.
Why Summerville Systems Need More Maintenance
Before we dive into the checklist, let’s talk about why maintenance matters more here than almost anywhere else.
The Extended Cooling Season
In Minneapolis, an AC might run 4 months per year. In Summerville, we’re cooling 8-9 months—sometimes longer. That’s twice the operating hours, twice the wear, and twice the opportunity for problems to develop.
A system that runs from April through November accumulates wear equivalent to nearly two years of operation in a milder climate. Maintenance intervals need to reflect that reality.
The Humidity Factor
Summerville’s average humidity hovers around 70-80% year-round. During summer mornings, it regularly exceeds 90%. This humidity:
- Forces your system to work harder (dehumidification uses significant energy)
- Creates ideal conditions for biological growth in drain lines and on coils
- Accelerates corrosion on electrical components and refrigerant lines
- Causes condensate drain clogs—one of the most common service calls we see
Related: Learn how Summerville’s humidity damages HVAC systems
Airborne Particulates
Between pollen season (which feels like it lasts 8 months here), coastal salt air, and general Lowcountry dust, your system filters more particulates than systems in cleaner environments. Filters clog faster, coils get dirtier, and airflow restrictions develop more quickly.
The Bottom Line
National maintenance guidelines assume average conditions. Summerville doesn’t have average conditions—we have extreme conditions. Your maintenance routine needs to account for that.
Monthly Maintenance Tasks
These quick tasks take 10-15 minutes and should become habit. Do them on the same day each month—the first Saturday, the day you pay your mortgage, whatever helps you remember.
1. Check and Replace Your Air Filter
This is the single most important thing you can do for your HVAC system. A clogged filter:
- Restricts airflow, forcing your system to work harder
- Causes evaporator coils to freeze
- Leads to compressor overheating and failure
- Increases energy consumption by 5-15%
- Reduces indoor air quality
How to check:
- Locate your filter (return air grille, air handler, or dedicated filter slot)
- Remove the filter and hold it up to light
- If you can’t see light through it clearly, replace it
- If it’s visibly gray or caked with debris, replace it immediately
Summerville-specific guidance:
- During peak cooling season (May-September), check weekly and replace every 30-45 days
- During shoulder seasons, check monthly and replace every 45-60 days
- During pollen season (spring), you may need to replace every 2-3 weeks
- After storms or high-wind events, check immediately
Filter recommendations:
- Use pleated filters rated MERV 8-11 for best balance of filtration and airflow
- Avoid fiberglass filters (minimal filtration) and ultra-high MERV ratings (can restrict airflow)
- Buy filters in bulk—you’ll use 8-12 per year in Summerville
2. Clear Supply and Return Vents
Blocked vents disrupt airflow balance and force your system to work harder.
Monthly walkthrough:
- Check all supply vents (where air blows out) for obstructions
- Check all return vents (where air is pulled in) for blockages
- Move furniture, curtains, rugs, or stored items that block airflow
- Vacuum vent covers to remove dust buildup
- Ensure all vents are open (closing vents doesn’t save energy—it creates pressure imbalances)
3. Monitor Thermostat Performance
Your thermostat is the brain of your HVAC system. Small issues here cause big problems.
Monthly checks:
- Verify the display is clear and responsive
- Confirm the temperature reading seems accurate (compare to a separate thermometer)
- Check that the system responds when you adjust settings
- Replace batteries annually (or when the low battery indicator appears)
- For smart thermostats, ensure WiFi connection is stable
Warning signs:
- Temperature swings greater than 2-3 degrees from setpoint
- System not responding to setting changes
- Blank or flickering display
- “Auxiliary heat” running frequently (for heat pump systems)
4. Listen and Observe
Your system tells you when something’s wrong—if you’re paying attention.
Monthly awareness check:
- Listen for unusual noises (grinding, squealing, banging, clicking)
- Notice any unusual odors from vents
- Feel for weak airflow or temperature inconsistencies
- Watch for water around the indoor unit
- Check for ice on refrigerant lines (visible at the outdoor unit)
Related: Know the 5 warning signs your AC is about to break down
Seasonal Maintenance Tasks
These tasks should be performed quarterly or at the start of each season. They’re more involved than monthly tasks but still manageable for most homeowners.
Spring: Prepare for Cooling Season
Complete these tasks in March or early April, before you need consistent cooling.
1. Deep clean or replace the filter
Start the season fresh with a new filter, even if the current one looks okay.
2. Clean the outdoor unit (condenser)
Your condenser sat dormant all winter, collecting leaves, debris, and dirt.
- Turn off power at the disconnect box near the unit
- Remove any debris from the top and sides
- Gently rinse the fins with a garden hose (not a pressure washer)
- Clear vegetation at least 2 feet from all sides
- Trim overhanging branches that drop debris
3. Treat the condensate drain line
Prevent the clogs that plague Summerville systems all summer.
- Locate the drain line (PVC pipe near indoor unit)
- Pour 1 cup of white vinegar or 1/2 cup of bleach down the line
- Wait 30 minutes, then flush with water
- Repeat monthly throughout cooling season
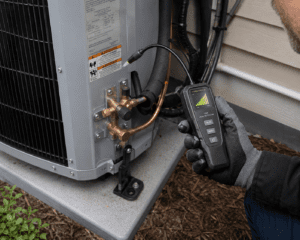
4. Inspect refrigerant lines
The copper lines connecting your indoor and outdoor units should be:
- Insulated along their entire length (foam insulation intact)
- Free of visible damage, kinks, or corrosion
- Not showing ice or frost (indicates a problem)
5. Test the system
- Set thermostat to cooling mode, 5 degrees below current temperature
- Verify the outdoor unit starts within a few minutes
- Confirm cool air flows from vents within 10-15 minutes
- Listen for unusual noises during startup and operation
6. Schedule professional maintenance
Spring is the ideal time for your annual cooling tune-up. Book early—HVAC companies get slammed once temperatures rise.
Summer: Peak Season Vigilance
During Summerville’s brutal summers, increase your maintenance frequency.
Weekly tasks:
- Check the filter (replace if needed)
- Verify condensate is draining properly (water should flow from drain line)
- Listen for any changes in system operation
Monthly tasks:
- Treat condensate drain line with vinegar or bleach
- Inspect outdoor unit for debris accumulation
- Check refrigerant lines for ice (indicates problems)
As needed:
- Clear outdoor unit after storms
- Rinse condenser coils if visibly dirty
- Address any warning signs immediately (don’t wait in summer heat)
Fall: Transition and Preparation
Complete these tasks in October, before heating season begins.
1. Final cooling season filter change
Replace the filter that worked hard all summer.
2. Clean outdoor unit thoroughly
Remove accumulated summer debris before the unit sits dormant.
3. Final condensate drain treatment
Prevent biological growth from establishing over the off-season.
4. Inspect and clean indoor vents
Remove vent covers and vacuum inside the duct openings (as far as you can reach).
5. Test heating operation
- Switch thermostat to heating mode
- Set temperature above current room temperature
- Verify warm air flows within 10-15 minutes
- Note any burning smell (normal briefly on first use—dust burning off)
- Listen for unusual noises
6. Schedule professional maintenance
Fall tune-ups prepare your heating system and address any wear from the cooling season.
Winter: Minimal but Important
Summerville winters are mild, but your system still needs attention.
Monthly tasks:
- Check and replace filter as needed
- Verify heating operates correctly
- Monitor for unusual noises or odors
Periodic tasks:
- Keep outdoor unit clear of debris (leaves, branches)
- Ensure nothing is stored against or on top of the unit
- Check that the condensate drain hasn’t frozen (rare in Summerville, but possible during cold snaps)
Professional Maintenance: What to Expect
While DIY maintenance handles the basics, professional tune-ups catch what you can’t see and address what you can’t safely do yourself.
When to Schedule
Twice per year:
- Spring (March-April): Cooling system tune-up before summer
- Fall (September-October): Heating system tune-up before winter
Why twice? Each tune-up focuses on different components. Spring addresses cooling-specific elements; fall addresses heating-specific elements. Both include inspection of shared components.
What a Professional Tune-Up Includes
A thorough HVAC maintenance visit should include:
Cooling System (Spring):
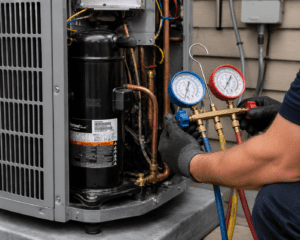
- Check refrigerant levels and inspect for leaks
- Clean evaporator and condenser coils
- Inspect and clean blower components
- Check electrical connections and tighten as needed
- Measure voltage and amperage on motors
- Lubricate moving parts
- Inspect condensate drain and clear if needed
- Calibrate thermostat
- Check system controls and safety switches
- Measure airflow and temperature differential
- Inspect ductwork for visible issues
- Provide system assessment and recommendations
Heating System (Fall):
- Inspect heat exchanger for cracks (critical safety check)
- Check burner operation and flame pattern (gas furnaces)
- Inspect flue and venting
- Test ignition system
- Check gas connections for leaks (gas furnaces)
- Inspect electrical connections
- Test safety controls
- Check thermostat calibration
- Lubricate moving parts
- Replace filter
- Test system operation
The Cost of Professional Maintenance
Typical pricing in Summerville:
- Single tune-up: $80-$150
- Annual maintenance plan: $150-$300 (includes both visits plus additional benefits)
Maintenance plan benefits often include:
- Priority scheduling (important during summer emergencies)
- Discounts on repairs (typically 10-20%)
- No overtime charges for after-hours calls
- Extended equipment life
- Maintained warranty validity (many manufacturers require professional maintenance)
Coastal Carolina Comfort’s Comfort Club
Our maintenance membership includes:
- Two comprehensive tune-ups per year (spring and fall)
- Priority scheduling—Comfort Club members go to the front of the line
- 15% discount on all repairs
- No after-hours service fees
- Transferable if you sell your home
- Peace of mind knowing your system is professionally maintained
The membership typically pays for itself with a single repair discount—everything else is bonus value.
The Complete Summerville HVAC Maintenance Calendar
Here’s your year at a glance:
January
- Check and replace filter
- Verify heating operation
- Clear debris from outdoor unit
February
- Check and replace filter
- Monitor system performance
- Begin planning spring tune-up appointment
March
- Check and replace filter
- Schedule spring professional maintenance
- Clean outdoor unit exterior
- Treat condensate drain line
April
- Professional spring tune-up
- Replace filter after tune-up
- Test cooling operation
- Inspect refrigerant line insulation
May
- Check filter weekly (replace as needed)
- Treat condensate drain line
- Clear outdoor unit after pollen season
- Monitor for humidity issues
June
- Check filter weekly (replace as needed)
- Treat condensate drain line
- Inspect outdoor unit for debris
- Verify proper drainage
July
- Check filter weekly (replace as needed)
- Treat condensate drain line
- Listen for unusual noises
- Check for ice on refrigerant lines
August
- Check filter weekly (replace as needed)
- Treat condensate drain line
- Rinse outdoor unit coils if needed
- Monitor energy bills for spikes
September
- Check and replace filter
- Schedule fall professional maintenance
- Final condensate drain treatment
- Clean outdoor unit thoroughly
October
- Professional fall tune-up
- Replace filter after tune-up
- Test heating operation
- Clean indoor vents
November
- Check and replace filter
- Verify heating operates correctly
- Clear fallen leaves from outdoor unit
December
- Check and replace filter
- Monitor system performance
- Ensure outdoor unit is clear
Common Maintenance Mistakes to Avoid
Even well-intentioned homeowners make these errors:
Mistake #1: Waiting Until Something Breaks
“If it ain’t broke, don’t fix it” doesn’t apply to HVAC systems. By the time something breaks, you’ve often caused additional damage that could have been prevented.
The fix: Follow the maintenance calendar proactively, not reactively.
Mistake #2: Using Cheap Filters
Dollar-store fiberglass filters capture less than 20% of airborne particles. They protect your system minimally and do almost nothing for air quality.
The fix: Invest in pleated MERV 8-11 filters. The extra $5-10 per filter saves hundreds in repairs and improves your air quality.
Mistake #3: Forgetting the Condensate Drain
Out of sight, out of mind—until water is pouring through your ceiling.
The fix: Treat the drain line monthly during cooling season. Set a phone reminder if needed.
Mistake #4: Closing Vents to “Save Energy”
Closing vents doesn’t reduce energy use—it creates pressure imbalances that stress your system and can cause duct leaks.
The fix: Keep all vents open. If certain rooms are too cold or hot, the solution is balancing dampers or addressing ductwork issues, not closing vents.
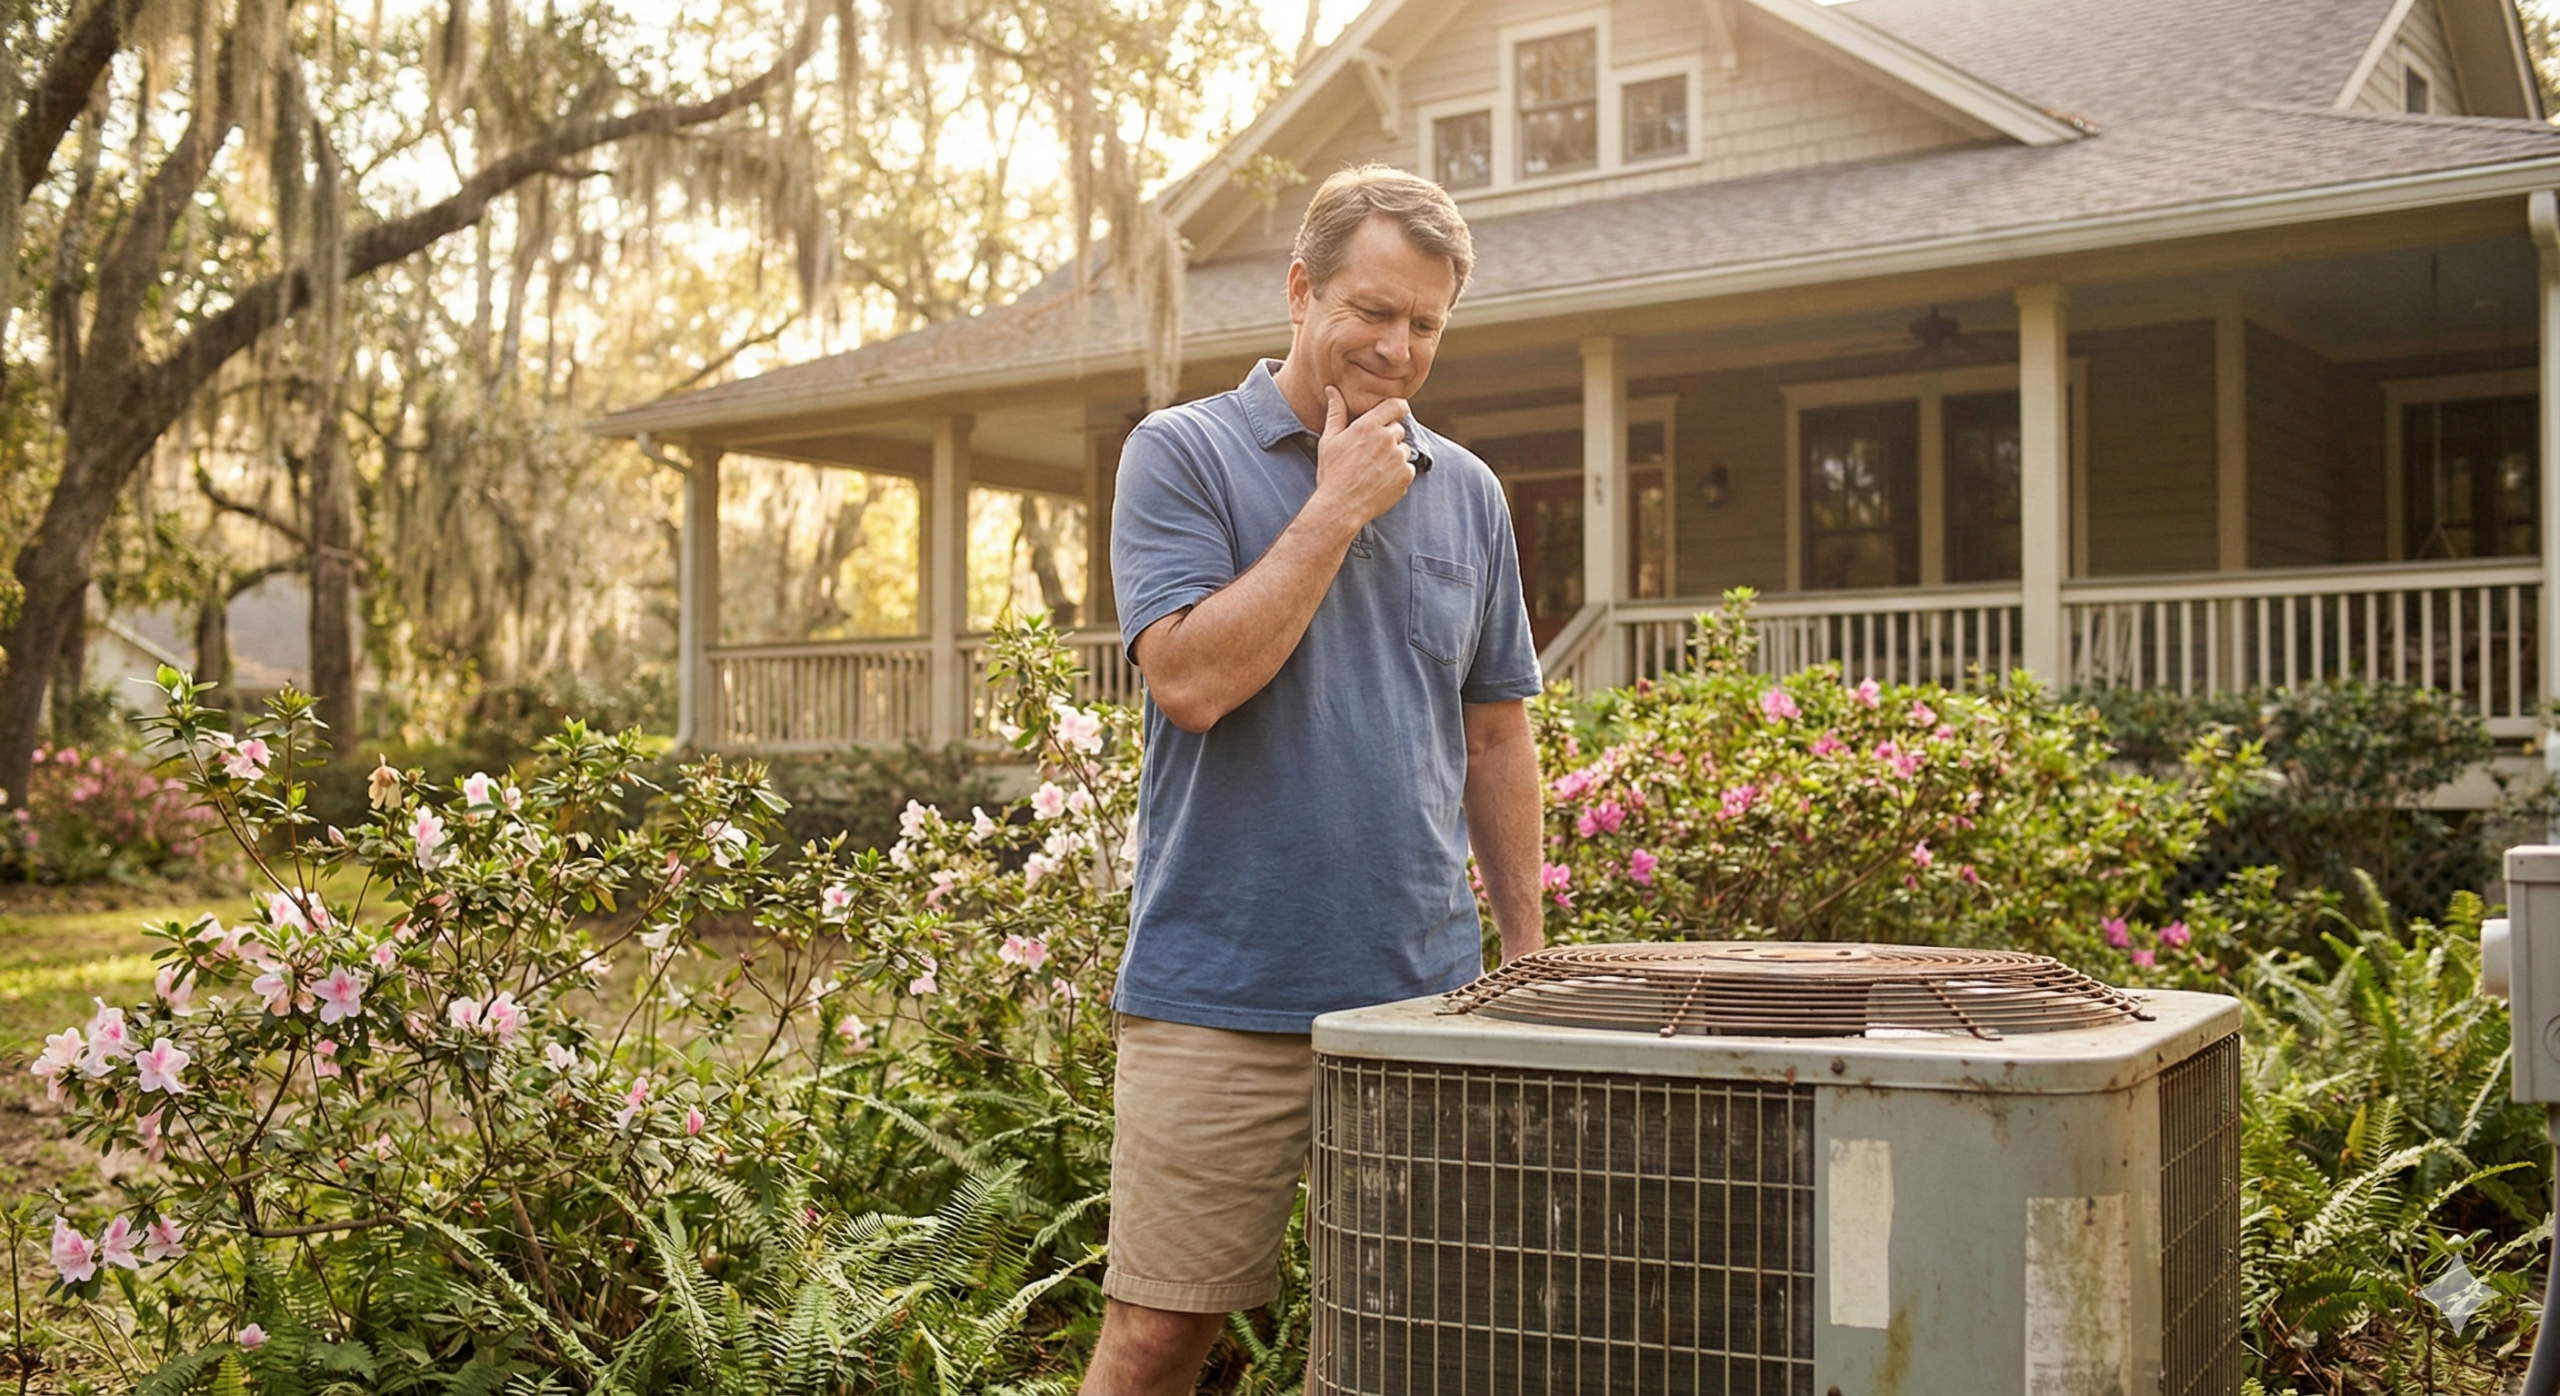
Mistake #5: Neglecting the Outdoor Unit
The condenser sits outside, so it’s easy to forget. But debris accumulation, vegetation encroachment, and dirty coils dramatically reduce efficiency and lifespan.
The fix: Include outdoor unit inspection in your monthly walkthrough. Clean it seasonally.
Mistake #6: Skipping Professional Maintenance
DIY maintenance is valuable, but it can’t replace professional service. You don’t have the tools, training, or refrigerant certification to do what a technician does.
The fix: Schedule professional tune-ups twice yearly, every year, without exception.
Mistake #7: Ignoring Warning Signs
Strange noises, weak airflow, unusual odors, rising bills—these are your system asking for help. Ignoring them turns minor issues into major repairs.
The fix: Address warning signs promptly. A $150 diagnostic visit is cheaper than a $1,500 emergency repair.
What Maintenance Can’t Fix
Maintenance prevents most problems, but it’s not magic. Some issues require professional repair regardless of how well you maintain your system:
Normal wear items:
- Capacitors (typically last 10-15 years)
- Contactors (similar lifespan)
- Fan motors (10-15 years with maintenance)
Age-related decline:
- Compressor wear (maintenance extends life but can’t prevent eventual failure)
- Refrigerant leaks from corrosion (maintenance slows but can’t stop corrosion)
- Efficiency loss (older systems simply can’t match modern efficiency)
Installation issues:
- Improper sizing (no amount of maintenance fixes an oversized or undersized system)
- Poor ductwork design (maintenance can’t overcome fundamental design flaws)
- Incorrect refrigerant charge (requires professional correction)
Environmental damage:
- Lightning strikes
- Flooding
- Storm damage
- Power surges
When these issues arise, maintenance has still served you well—it’s extended your system’s life, reduced your repair frequency, and kept you comfortable longer than neglect would have allowed.
Related: Know when it’s time to repair vs. replace your system
Start Today: Your First 30 Days
If you haven’t been maintaining your system, don’t try to do everything at once. Here’s a realistic 30-day plan to get on track:
Week 1: The Basics
- Check and replace your air filter
- Walk through your home and clear all blocked vents
- Listen to your system run for a full cycle—note any unusual sounds
Week 2: The Outdoor Unit
- Turn off power and clear debris from the condenser
- Trim vegetation to maintain 2-foot clearance
- Rinse the coils gently with a garden hose
Week 3: The Drain Line
- Locate your condensate drain line
- Pour vinegar or bleach down the line
- Verify water flows freely from the exit point
Week 4: Professional Assessment
- Schedule a professional tune-up
- Ask the technician to assess your system’s condition
- Discuss any concerns or warning signs you’ve noticed
- Consider enrolling in a maintenance plan
After this initial month, you’ll have a baseline understanding of your system’s condition and a foundation for ongoing maintenance.
Protect Your Investment
Your HVAC system is one of the most expensive mechanical systems in your home—$6,000 to $15,000 or more to replace. It’s also one of the most important for your daily comfort and quality of life.
Maintenance is the best investment you can make in that system. For a few hours of attention per year and a couple hundred dollars in professional service, you can:
- Prevent 90% of repairs
- Extend system life by 5-7 years
- Reduce energy bills by 10-20%
- Maintain consistent comfort
- Avoid emergency breakdowns
- Protect your warranty
At Coastal Carolina Comfort, we’ve seen the difference maintenance makes—thousands of times over. The homeowners who follow a routine like this one call us for tune-ups. The ones who don’t call us for emergencies.
We’d rather see you for the tune-up.
Schedule your maintenance visit today or call us at 843-256-6476. Whether you need a one-time tune-up or want to join our Comfort Club for year-round protection, we’re here to help you keep your system running smoothly—no matter what Summerville’s climate throws at it.
Frequently Asked Questions
How often should I really change my filter in Summerville?
During peak cooling season (May-September), check your filter weekly and replace it every 30-45 days. Summerville’s humidity, pollen, and extended run times clog filters faster than manufacturer guidelines suggest. During milder months, every 45-60 days is typically sufficient. When in doubt, check it—if you can’t see light through it clearly, replace it.
Is a maintenance plan worth the money?
For most Summerville homeowners, yes. A typical plan costs $150-$300 annually and includes two professional tune-ups (worth $160-$300 alone), plus repair discounts and priority scheduling. The plan often pays for itself with a single repair discount. More importantly, regular professional maintenance catches problems early and extends equipment life—savings that compound over years.
Can I do HVAC maintenance myself or do I need a professional?
Both. Homeowners can and should handle monthly tasks (filter changes, vent clearing, visual inspections) and seasonal tasks (condensate drain treatment, outdoor unit cleaning). However, professional maintenance is essential for tasks requiring specialized tools, refrigerant handling, electrical testing, and comprehensive system assessment. The combination of DIY and professional maintenance provides the best protection.
What happens if I skip maintenance for a year?
One skipped year probably won’t cause immediate failure, but it accelerates wear and allows small problems to become big ones. Dirty coils reduce efficiency by 10-25%. Clogged drain lines cause water damage. Electrical connections loosen and corrode. Refrigerant leaks go undetected. Most importantly, you lose the opportunity to catch problems early when they’re cheap to fix.
How do I know if my HVAC technician did a thorough job?
A thorough tune-up takes 45-90 minutes, not 15-20. The technician should check both indoor and outdoor components, take measurements (refrigerant pressure, temperature differential, amperage), and provide a written report of findings. They should be able to explain what they did and answer your questions. If a “tune-up” consists of only changing the filter and glancing at the unit, you didn’t get what you paid for.