 How Summerville’s Humidity Destroys HVAC Systems (And How to Fight Back)
Summerville’s high humidity—averaging 70-80% year-round—forces HVAC systems to work significantly harder than in drier climates. Excess moisture causes evaporator coil corrosion, refrigerant line damage, condensate drain clogs, and accelerated wear on compressors and fan motors. Lowcountry homeowners can protect their systems by maintaining proper airflow, scheduling regular maintenance, ensuring adequate drainage, and considering whole-home dehumidification solutions. Without proactive care, humidity cuts years off your system’s lifespan and drives up energy costs.
The Invisible Enemy in Your Home
If you’ve lived in Summerville for more than one summer, you know the humidity isn’t just uncomfortable—it’s oppressive. Step outside in July and the air wraps around you like a warm, wet blanket. Your glasses fog up walking from the car to the front door. Your hair does things you didn’t ask it to do.
But here’s what most homeowners don’t realize: that same humidity is waging a slow war on your HVAC system every single day.
At Coastal Carolina Comfort, we’ve spent over a decade repairing and replacing systems across the Lowcountry. And we can tell you this with certainty—humidity is the silent killer of HVAC equipment in our region. Systems that should last 18-20 years are giving out at 12. Units that ran efficiently for years suddenly can’t keep up.
The good news? Once you understand how humidity attacks your system, you can fight back. Let’s break down exactly what’s happening inside your HVAC—and what you can do about it.
Why Summerville’s Humidity Is So Hard on HVAC Systems
The Numbers Don’t Lie
Summerville averages 70-80% relative humidity throughout the year. During summer months, it’s not uncommon to see 90%+ humidity in the early morning hours. Compare that to Phoenix at 20-30% or Denver at 40-50%, and you start to understand the challenge.
Your air conditioner wasn’t just designed to cool air—it’s designed to remove moisture. In fact, dehumidification accounts for roughly 30% of your AC’s workload in a humid climate. In Summerville, that number climbs even higher.
The Double Duty Problem
Every time your AC runs, it’s doing two jobs simultaneously:
- Cooling the air by absorbing heat through the evaporator coil
- Dehumidifying by condensing moisture out of the air onto that same coil
In drier climates, the cooling job dominates. In Summerville, your system spends enormous energy just wringing water out of the air. This means longer run times, higher energy bills, and accelerated wear on every component.
What “Feels Like” Temperature Really Means
When the weather app says it’s 88°F but “feels like” 102°F, that’s humidity at work. Your body cools itself through sweat evaporation—but when the air is already saturated with moisture, that sweat can’t evaporate efficiently.
The same principle applies to your home. High humidity makes 74°F feel stuffy and uncomfortable, so you crank the thermostat down to 70°F. Now your system runs even longer, works even harder, and wears out even faster.
5 Ways Humidity Damages Your HVAC System
1. Evaporator Coil Corrosion and Buildup
Your evaporator coil is ground zero for humidity removal. As warm, moist air passes over the cold coil, water vapor condenses into liquid—just like condensation on a cold glass of sweet tea.
In Summerville’s humidity, your coil handles gallons of water daily. This constant moisture exposure causes:
Corrosion: The coil’s aluminum or copper fins gradually corrode, reducing heat transfer efficiency and eventually causing refrigerant leaks.
Biological buildup: The perpetually damp environment creates ideal conditions for organic growth on and around the coil. This buildup insulates the coil, forcing your system to work harder. It also restricts airflow and can cause unpleasant odors.
Note: If you suspect biological contamination in your HVAC system, we recommend consulting with a qualified specialist who can properly assess and remediate the situation.
Dirt accumulation: Moisture makes the coil sticky, trapping dust, pollen, and debris that would otherwise pass through. This layer of gunk further reduces efficiency.
2. Condensate Drain Line Clogs
All that moisture your AC removes has to go somewhere. It drips into a drain pan and flows out through a condensate drain line—typically a PVC pipe that exits near your outdoor unit or into a floor drain.
In humid Summerville, this drain line handles far more water than systems in drier climates. The constant moisture flow creates a perfect environment for:
- Algae growth inside the line
- Organic slime buildup
- Debris accumulation at connection points
When the drain clogs, water backs up into the drain pan. If the pan overflows, you’re looking at water damage to ceilings, walls, and floors. Many systems have a safety float switch that shuts down the AC when water backs up—which means you come home to a hot house and no idea why.
Pro tip: We see more condensate drain clogs in Summerville between May and September than any other issue. A $15 preventive treatment can save you a $150+ service call.
3. Compressor Strain and Premature Failure
Your compressor is the heart of your AC system—and the most expensive component to replace. It’s responsible for pressurizing refrigerant and circulating it through the system.
Humidity increases compressor workload in several ways:
Extended run times: When your system runs longer to handle moisture removal, the compressor runs longer too. More operating hours means more wear.
Higher head pressure: Humid conditions can increase the pressure your compressor works against, generating more heat and stress on internal components.
Short-cycling risk: If humidity causes coil icing or other issues, the system may short-cycle—turning on and off frequently. Each startup is the hardest moment for a compressor, so frequent cycling dramatically accelerates wear.
A compressor replacement typically costs $1,500-$3,000 including labor. In many cases, it makes more sense to replace the entire system at that point.
4. Ductwork Deterioration
Your ductwork is often the forgotten component of your HVAC system—out of sight in attics, crawl spaces, and wall cavities. In Summerville’s humidity, those hidden spaces become problem zones.
Condensation on ducts: When cold air flows through ducts in a hot, humid attic or crawl space, condensation forms on the outside of the ducts. Over time, this moisture:
- Degrades duct insulation
- Corrodes metal ductwork and connections
- Saturates surrounding insulation materials
- Creates conditions for biological growth
Flex duct sagging: Many Summerville homes use flexible ductwork, which can sag over time—especially when moisture adds weight to the outer insulation layer. Sagging ducts restrict airflow and reduce system efficiency.
Crawl space concerns: Homes with vented crawl spaces face particular challenges. Humid outside air enters the crawl space, condenses on cooler surfaces, and creates a perpetually damp environment that affects everything above it—including your ductwork and air handler.
5. Electrical Component Damage
Humidity doesn’t just affect the mechanical parts of your system—it attacks electrical components too.
Contactor and relay corrosion: These electrical switches control when your compressor and fan motors turn on. Moisture exposure causes contact points to corrode, leading to pitting, arcing, and eventual failure.
Capacitor degradation: Capacitors store electrical energy to help motors start and run. Humidity accelerates the breakdown of capacitor materials, leading to premature failure. A failed capacitor is one of the most common AC repairs we see in the Lowcountry.
Control board issues: Modern HVAC systems rely on electronic control boards. While these are typically protected, humidity can still cause corrosion on connections and circuit traces over time.
Wiring insulation breakdown: Prolonged moisture exposure degrades wire insulation, increasing the risk of shorts and electrical faults.
Warning Signs of Humidity Damage
How do you know if humidity is already affecting your system? Watch for these red flags:
Comfort Issues
- Home feels muggy even when AC runs: Your system may not be removing enough moisture
- Condensation on windows: Indoor humidity is too high
- Musty odors from vents: Possible biological growth in the system or ductwork
- Uneven temperatures between rooms: Could indicate ductwork issues
System Performance Issues
- AC runs constantly but doesn’t cool well: Possible coil issues or refrigerant problems from corrosion
- Water around indoor unit: Condensate drain clog or pan overflow
- Ice on refrigerant lines: Often caused by airflow restrictions from dirty coils
- Frequent cycling on and off: Multiple possible humidity-related causes
Efficiency Issues
- Rising energy bills: System working harder than it should
- More frequent repairs: Humidity accelerating component wear
- System age not matching lifespan: Premature aging from moisture damage
Related: If you’re experiencing these issues in Sangaree or Wescott, our technicians are familiar with the specific challenges in your neighborhoods. Learn more about HVAC repair in Summerville.
How to Protect Your HVAC System From Humidity Damage
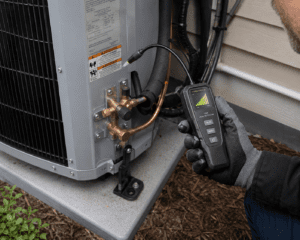
1. Prioritize Regular Maintenance
In humid climates, maintenance isn’t optional—it’s essential. A twice-yearly tune-up should include:
- Coil cleaning: Removes buildup that traps moisture and reduces efficiency
- Condensate drain treatment: Clears and treats the drain line to prevent clogs
- Electrical inspection: Checks for corrosion on contacts, capacitors, and connections
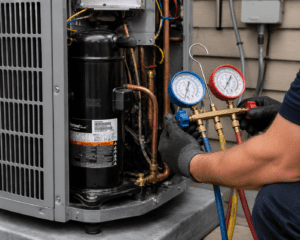
- Refrigerant check: Ensures proper levels (low refrigerant often indicates a leak from corrosion)
- Airflow verification: Confirms the system moves air properly
Summerville homeowners should schedule maintenance in spring (before cooling season) and fall (before heating season). Our Comfort Club members get both visits included, plus priority scheduling when issues arise.
2. Change Filters More Frequently
Standard filter replacement guidelines don’t account for Lowcountry conditions. In Summerville, we recommend:
- Check monthly during peak cooling season (April-October)
- Replace every 30-45 days when running constantly
- Use quality pleated filters (MERV 8-11) that trap more particles without restricting airflow
- Avoid ultra-high MERV ratings (13+) unless your system is designed for them—they can restrict airflow and cause coil icing
A clean filter ensures proper airflow across the evaporator coil, which is critical for both cooling and dehumidification.
3. Keep Your Condensate Drain Clear
Between professional maintenance visits, you can help prevent drain clogs:
Monthly during summer:
- Locate your condensate drain line (usually a PVC pipe near your indoor unit)
- Pour a cup of white vinegar or a half-cup of bleach down the line
- Wait 30 minutes, then flush with water
Watch for warning signs:
- Water in the drain pan that doesn’t drain quickly
- Musty odors near the indoor unit
- Water stains on ceilings below the air handler
4. Consider Whole-Home Dehumidification
If your AC struggles to keep humidity comfortable—or if you find yourself setting the thermostat lower than you’d like just to reduce mugginess—a whole-home dehumidifier may be the answer.
These units integrate with your existing HVAC system and remove moisture independently of cooling. Benefits include:
- Set humidity levels directly (ideal is 45-50% relative humidity)
- Reduce AC workload by handling dehumidification separately
- Improve comfort at higher thermostat settings (saving energy)
- Protect your home from moisture-related issues beyond HVAC
Whole-home dehumidifiers are particularly valuable in Summerville homes with:
- Chronically high indoor humidity
- Musty odors that persist despite AC operation
- Condensation on windows or cold surfaces
- Older or undersized AC systems
5. Address Crawl Space Issues
If your home has a vented crawl space, you’re fighting an uphill battle against humidity. Hot, humid air enters through foundation vents, condenses on cooler surfaces, and creates a moisture reservoir under your home.
Crawl space encapsulation seals the crawl space from outside air and installs a vapor barrier, dramatically reducing moisture intrusion. This protects your:
- HVAC equipment and ductwork in the crawl space
- Floor joists and subfloor
- Indoor air quality
- Energy efficiency
At Coastal Carolina Comfort, we offer crawl space encapsulation services specifically designed for Lowcountry conditions. It’s one of the most impactful upgrades a Summerville homeowner can make.
6. Ensure Proper System Sizing
An oversized AC is actually worse for humidity control than a properly sized one. Here’s why:
Oversized systems cool the air quickly, then shut off before running long enough to remove adequate moisture. The result? A cool but clammy home, and a system that short-cycles constantly.
If your home always feels humid despite the AC running, improper sizing may be the culprit—especially if the system was installed without a proper load calculation.
The True Cost of Ignoring Humidity
Let’s talk numbers. Humidity damage isn’t just uncomfortable—it’s expensive.
Shortened System Lifespan
A well-maintained AC in a moderate climate lasts 18-20 years. In Summerville, without proper humidity management, we commonly see systems fail at 10-12 years. That’s potentially $8,000-$15,000 in replacement costs you’re paying 6-8 years early.
Higher Energy Bills
A system fighting humidity runs longer and works harder. Homeowners with humidity issues often see cooling costs 20-30% higher than they should be. Over a Summerville summer, that adds up to hundreds of dollars.
More Frequent Repairs
Humidity accelerates wear on every component. Instead of occasional repairs, you’re looking at annual service calls—capacitors, contactors, drain clogs, coil cleanings. These $150-$400 repairs add up quickly.
Comfort You’re Paying For But Not Getting
Perhaps the most frustrating cost is paying to cool your home but never feeling comfortable. You’re running the AC constantly, watching the bills climb, and still feeling sticky.
When to Call a Professional
Some humidity issues are DIY-manageable. Others require professional diagnosis and repair.
Handle yourself:
- Monthly filter checks and replacement
- Condensate drain line treatments
- Monitoring for warning signs
Call a professional:
- Persistent humidity despite AC operation
- Water leaks or overflow from the system
- Musty odors that don’t resolve with filter changes
- Coil cleaning (requires specialized equipment and refrigerant handling)
- Any electrical concerns
- System sizing evaluation
- Whole-home dehumidification installation
- Crawl space assessment and encapsulation
Fight Back Against Lowcountry Humidity
Summerville’s humidity isn’t going anywhere. But that doesn’t mean you have to let it destroy your HVAC system and drain your wallet.
At Coastal Carolina Comfort, we understand the unique challenges Lowcountry homeowners face. We’ve built our maintenance programs, repair expertise, and installation practices around the reality of our climate—not generic guidelines written for somewhere else.
Whether you need a tune-up to get ahead of humidity season, repairs to fix damage that’s already occurred, or a consultation about whole-home dehumidification or crawl space encapsulation, we’re here to help.
Schedule your HVAC inspection today or call us at 843-253-0800. We’ll help you take control of your indoor comfort—no matter what the humidity does outside.
Frequently Asked Questions
What humidity level should I maintain inside my Summerville home?
The ideal indoor relative humidity is between 45-50%. This range balances comfort, health, and protection for your home and HVAC system. Below 30% causes dry skin and respiratory irritation; above 60% promotes biological growth and makes your home feel uncomfortable regardless of temperature.
Can my AC alone control humidity in Summerville?
In many cases, a properly sized and well-maintained AC can maintain acceptable humidity levels. However, Summerville’s extreme humidity often overwhelms standard AC systems, especially in older homes, homes with crawl spaces, or during shoulder seasons when you need dehumidification but not much cooling. A whole-home dehumidifier provides independent humidity control.
How do I know if my AC is removing enough humidity?
Monitor your indoor humidity with an inexpensive hygrometer (available at any hardware store for under $15). If humidity consistently stays above 55-60% while your AC runs, your system isn’t keeping up. Also watch for condensation on windows, musty odors, or that “clammy” feeling even when the temperature reads comfortable.
Does running my AC fan on “on” instead of “auto” help with humidity?
Actually, the opposite. Running the fan continuously re-evaporates moisture from the wet evaporator coil back into your home’s air. For best humidity control in Summerville, keep your fan set to “auto” so it only runs during cooling cycles when moisture is actively being removed.
Will a dehumidifier reduce my AC costs?
Yes, in most cases. When indoor humidity is controlled, you’ll feel comfortable at higher thermostat settings—often 2-4 degrees higher. Since each degree of thermostat increase saves roughly 3% on cooling costs, a dehumidifier can meaningfully reduce your overall energy bills while improving comfort.