Home of the $0 FREE Service Call Club | 0% Interest for 24 Months

Home of the $0 FREE Service Call Club | 0% Interest for 24 Months

Home of the $0 FREE Service Call Club | 0% Interest for 24 Months

It doesn’t take much for Charleston’s humid, warm weather to make you appreciate a working air conditioner. But if you walk into your home and realize the air feels sticky or warm, and your unit is covered in ice, your AC may have frozen up. Even though it might seem strange, an AC freeze-up is a pretty common problem for homeowners around here, especially during high-use months when the system runs more frequently.

When your AC freezes, it can’t cool your home properly and could end up damaging itself if not handled quickly. Ignoring it or trying temporary fixes can lead to more expensive repairs. Whether it’s just a light frost or a block of ice wrapping around your AC coils, it’s best to deal with it as soon as possible. Here’s how to spot the signs, take a few safe steps at home, and understand what might be causing the problem.

Identifying Signs Of A Frozen AC

It’s not always obvious your air conditioner is frozen at first. Things might seem normal until the house starts to feel warmer than usual, or you notice something odd coming from the vents. Paying attention to those small warning signs can help you fix the issue before it becomes a bigger problem.

Here are a few clear signs your AC may be frozen:

– The air coming out of your vents is weak or not cool

– Ice or frost is visible on the evaporator coil or refrigerant lines

– You hear strange noises like hissing or rattling from the unit

– Your AC is running, but the house is still warm

– Water starts dripping or pooling around the inside unit

When your AC keeps trying to run while frozen, it puts a strain on the system. That could push the unit harder than it should work and cause even more damage, especially to the compressor. So the minute you notice one or more of these signs, it’s time to take action and give the system a break.

Immediate Steps To Take When Your AC Freezes Up

If you think your AC has frozen, resist the urge to crank it back to a lower temperature to make it work harder. That might feel like a logical move, but it’ll do the opposite. Here’s what to do instead:

1. Turn off the system: Start by switching your thermostat to OFF. This keeps the system from running and lets it begin thawing.

2. Set the fan to ON: If your AC has a setting that lets just the fan run without cooling, turn it on. This will help warm air circulate around the coils and melt the ice faster.

3. Wait for it to thaw completely: Depending on how frozen the unit is, this could take several hours. Don’t restart the AC until you’re sure all the ice is gone.

4. Check your air filter: A dirty filter can block airflow and cause freezing. If your filter looks dusty or clogged, go ahead and replace it.

It’s a good idea to keep pets and kids away from the indoor unit while it’s thawing, especially if water begins to collect around the base. Set out towels or a shallow container underneath the indoor system to catch drips if needed.

Once the ice melts, if your AC seems to work normally again, that’s a good sign. But chances are something triggered the freeze, and if you don’t fix the cause, the problem will come right back. That’s why figuring out what led to the freeze is the next big step.

Common Causes Of AC Freezing And How To Address Them

Once your AC starts working again, it’s important to figure out what caused the freeze-up in the first place. This usually ties back to airflow problems or refrigerant issues — two things that can keep your system from moving heat the way it should.

One of the most common causes is dirty air filters. If the filter is clogged, airflow gets restricted, which prevents the coils inside your unit from staying warm enough. When the air doesn’t move as it should, condensation builds up on the coils and freezes. That layer of ice then blocks more airflow, and it turns into a cycle.

Another reason your AC might ice over is dirty evaporator coils. Even with a clean filter, dust and debris can collect on the coils over time. That buildup acts like insulation, trapping cold air around the coil and reducing the system’s ability to regulate temperature. This can result in freeze-ups, especially during long cooling cycles in Charleston’s late summer heat.

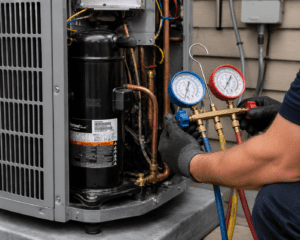
Low refrigerant levels are also a known culprit. When the system is low on refrigerant, pressure inside the coils drops. That drop causes the coils to get colder than normal, which leads to ice buildup. And if there’s a leak somewhere, it can affect your system performance in other ways too, like making your AC run constantly or take longer to cool down.

Blocked air registers or closed vents can mess with airflow as well. You might think you’re saving energy by closing off certain areas of the house, but doing that can back up your airflow and throw the system out of balance. That puts unnecessary pressure on your AC and increases the chances of it freezing.

To prevent another freeze-up, it’s smart to have your entire system inspected. That way, you’re not guessing at the cause — someone can assess filters, refrigerant levels, coil condition, and how well air is circulating through each room.

Professional Solutions For Avoiding Future Freeze-Ups

Even if your AC thawed and seems fine now, there’s often a bigger issue behind the problem. It’s one thing to handle surface-level symptoms, but it’s another to make sure your system works like it should when the weather heats up again. That’s where some professional help makes a big difference.

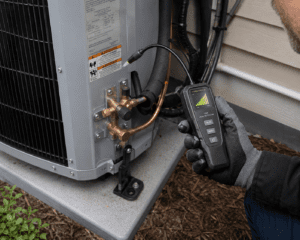
Technicians have the tools and training to check refrigerant pressure accurately, test for leaks, and clean coils deep inside the unit. These aren’t things that most homeowners have the tools or time to do on their own. A proper inspection also includes checking your thermostat and making sure it doesn’t trigger cooling cycles that are too frequent or too long, which can also cause freezing problems.

Ductwork is another big factor. If your ducts are leaking, crushed, or full of dust, your system has to work harder to keep up. Sealing and cleaning the ducts can restore airflow, which helps stop that freeze cycle before it starts. In some Charleston homes, especially older ones, duct issues go unnoticed for years. This leads to strange airflow patterns, hot and cold spots, and more wear on your AC over time.

A good maintenance routine lowers the chances of parts wearing out early or small issues turning into system failures. Having someone look at your AC before peak cooling season kicks in helps reduce surprises down the road. And when there’s consistent care, your system can push through Charleston’s humid stretches without struggling or freezing up.

Keep Your AC Running Smoothly In Charleston

AC freeze-ups can fool you. They seem scary in the moment but usually point back to fixable causes. Whether it’s a dirty filter, blocked coil, low refrigerant, or airflow issue, the key is getting to the root before it turns into something bigger. Waiting it out or ignoring repeat freeze-ups tends to stress your system more, and breakdowns are never fun when it’s hot outside.

If your AC froze once, chances are it could happen again. That’s why paying attention to signs early and making sure all parts of your system are working together really matters. Whether it’s a late summer day in Charleston or the first hint of fall, you want your AC to work when you need it most. Taking the right steps now means fewer interruptions, better comfort, and a home that stays cool without the drama.

Keeping your AC running smoothly is important, especially in Charleston’s humid climate. If you’re dealing with frequent freeze-ups or airflow problems, trust the team at Coastal Carolina Comfort to help. Learn more about how we can provide reliable AC help in Charleston to keep your home comfortable no matter the season.

Share This Post

Get 10% Off Your First Service and a FREE Quote


More To Explore

Hvac Repair In Summerville
HVAC

The Summerville HVAC Maintenance Checklist

The Summerville HVAC Maintenance Checklist That Prevents 90% of Repairs Regular HVAC maintenance prevents up to 90% of common repairs and extends system lifespan by 5-7 years. Summerville homeowners should perform monthly tasks (filter checks, vent clearing, thermostat monitoring), seasonal tasks (condensate drain treatment, outdoor unit cleaning, refrigerant line inspection), and schedule professional tune-ups twice yearly—in spring before cooling season and fall before heating season. The Lowcountry’s extreme humidity, extended cooling season, and airborne particulates demand more frequent maintenance than national guidelines suggest. A well-maintained system runs more efficiently, breaks down less often, and keeps your home comfortable year-round. Introduction: The Cheapest Repair Is the One You Never Need Here’s a number that should get your attention: 90%. That’s the percentage of HVAC repairs that could have been prevented with proper maintenance. Nine out of ten service calls we make in Summerville are for problems that didn’t have to happen. Clogged filters that caused compressors to overheat. Condensate drains that backed up and flooded ceilings. Capacitors that failed because coils were too dirty to dissipate heat. Refrigerant leaks that started as minor corrosion nobody caught. Every one of these repairs cost the homeowner hundreds—sometimes thousands—of dollars. And every one of them was preventable. At Coastal Carolina Comfort, we’ve maintained HVAC systems across the Lowcountry for over a decade. We’ve seen what neglect does to equipment in our climate. We’ve also seen homeowners who follow a simple maintenance routine go 10+ years without a single major repair. This guide gives you that routine. It’s specifically designed for Summerville’s climate—not generic advice written for somewhere with mild summers and low humidity. Follow this checklist, and you’ll dramatically reduce your repair bills, extend your system’s life, and stay comfortable no matter what the Lowcountry weather throws at you. Why Summerville Systems Need More Maintenance Before we dive into the checklist, let’s talk about why maintenance matters more here than almost anywhere else. The Extended Cooling Season In Minneapolis, an AC might run 4 months per year. In Summerville, we’re cooling 8-9 months—sometimes longer. That’s twice the operating hours, twice the wear, and twice the opportunity for problems to develop. A system that runs from April through November accumulates wear equivalent to nearly two years of operation in a milder climate. Maintenance intervals need to reflect that reality. The Humidity Factor Summerville’s average humidity hovers around 70-80% year-round. During summer mornings, it regularly exceeds 90%. This humidity: Forces your system to work harder (dehumidification uses significant energy) Creates ideal conditions for biological growth in drain lines and on coils Accelerates corrosion on electrical components and refrigerant lines Causes condensate drain clogs—one of the most common service calls we see Related: Learn how Summerville’s humidity damages HVAC systems Airborne Particulates Between pollen season (which feels like it lasts 8 months here), coastal salt air, and general Lowcountry dust, your system filters more particulates than systems in cleaner environments. Filters clog faster, coils get dirtier, and airflow restrictions develop more quickly. The Bottom Line National maintenance guidelines assume average conditions. Summerville doesn’t have average conditions—we have extreme conditions. Your maintenance routine needs to account for that. Monthly Maintenance Tasks These quick tasks take 10-15 minutes and should become habit. Do them on the same day each month—the first Saturday, the day you pay your mortgage, whatever helps you remember. 1. Check and Replace Your Air Filter This is the single most important thing you can do for your HVAC system. A clogged filter: Restricts airflow, forcing your system to work harder Causes evaporator coils to freeze Leads to compressor overheating and failure Increases energy consumption by 5-15% Reduces indoor air quality How to check: Locate your filter (return air grille, air handler, or dedicated filter slot) Remove the filter and hold it up to light If you can’t see light through it clearly, replace it If it’s visibly gray or caked with debris, replace it immediately Summerville-specific guidance: During peak cooling season (May-September), check weekly and replace every 30-45 days During shoulder seasons, check monthly and replace every 45-60 days During pollen season (spring), you may need to replace every 2-3 weeks After storms or high-wind events, check immediately Filter recommendations: Use pleated filters rated MERV 8-11 for best balance of filtration and airflow Avoid fiberglass filters (minimal filtration) and ultra-high MERV ratings (can restrict airflow) Buy filters in bulk—you’ll use 8-12 per year in Summerville 2. Clear Supply and Return Vents Blocked vents disrupt airflow balance and force your system to work harder. Monthly walkthrough: Check all supply vents (where air blows out) for obstructions Check all return vents (where air is pulled in) for blockages Move furniture, curtains, rugs, or stored items that block airflow Vacuum vent covers to remove dust buildup Ensure all vents are open (closing vents doesn’t save energy—it creates pressure imbalances) 3. Monitor Thermostat Performance Your thermostat is the brain of your HVAC system. Small issues here cause big problems. Monthly checks: Verify the display is clear and responsive Confirm the temperature reading seems accurate (compare to a separate thermometer) Check that the system responds when you adjust settings Replace batteries annually (or when the low battery indicator appears) For smart thermostats, ensure WiFi connection is stable Warning signs: Temperature swings greater than 2-3 degrees from setpoint System not responding to setting changes Blank or flickering display “Auxiliary heat” running frequently (for heat pump systems) 4. Listen and Observe Your system tells you when something’s wrong—if you’re paying attention. Monthly awareness check: Listen for unusual noises (grinding, squealing, banging, clicking) Notice any unusual odors from vents Feel for weak airflow or temperature inconsistencies Watch for water around the indoor unit Check for ice on refrigerant lines (visible at the outdoor unit) Related: Know the 5 warning signs your AC is about to break down Seasonal Maintenance Tasks These tasks should be performed quarterly or at the start of each season. They’re more involved than monthly tasks but still manageable for most homeowners. Spring: Prepare for Cooling Season Complete these tasks in

Hvac Repair Vs Replacement
Air Conditioning

HVAC Repair vs. Replacement

HVAC Repair vs. Replacement: A Summerville Homeowner’s Decision Guide Deciding between HVAC repair and replacement comes down to four key factors: the cost of repair relative to replacement (use the 50% rule—if repairs exceed half the cost of a new system, replace), the age of your equipment (systems over 15 years old are usually better replaced), refrigerant type (R-22 systems should be replaced due to phase-out costs), and repair frequency (multiple repairs per year signal it’s time). Summerville homeowners should also factor in energy efficiency gains, available rebates, and the demanding Lowcountry climate that shortens system lifespans compared to national averages. The Question Every Homeowner Dreads Your HVAC technician just delivered the news: your system needs a major repair. Maybe it’s a compressor. Maybe it’s a coil leak. Whatever it is, the number has four digits, and now you’re facing the question every Summerville homeowner eventually confronts. Do I fix it, or do I replace the whole thing? It’s not an easy decision. Repair feels like the cheaper option—until you’re repairing again six months later. Replacement feels like the responsible choice—until you see the price tag. And everyone from your neighbor to your brother-in-law has an opinion. At Coastal Carolina Comfort, we’ve guided thousands of Lowcountry homeowners through this exact decision. We’ve seen people waste money repairing systems that should have been replaced years ago. We’ve also seen people replace perfectly good equipment because someone talked them into it. This guide will give you the framework to make the right decision for your situation—not based on sales pressure, but on facts, math, and what actually makes sense for your home and budget. The 50% Rule: Your Starting Point The most reliable rule of thumb in the HVAC industry is simple: If the repair costs more than 50% of what a new system would cost, replace instead of repair. Here’s why this works: The Math Behind the Rule Let’s say a new HVAC system for your Summerville home costs $8,000 installed. Using the 50% rule: Repair cost under $4,000: Repair is likely the better value Repair cost over $4,000: Replacement makes more financial sense But this isn’t just about today’s repair. It’s about what comes next. A system that needs a $3,500 repair today is likely to need another significant repair within 1-2 years. That’s the nature of aging equipment—when major components fail, others are usually close behind. So that $3,500 repair might actually cost you $3,500 + $1,200 + $800 over the next two years. Suddenly you’ve spent $5,500 and still have an old, inefficient system. When to Adjust the Rule The 50% rule is a starting point, not an absolute. Adjust based on: System age: For systems under 8 years old, you might stretch to 60-70% before replacing—they likely have more good years ahead. For systems over 12 years old, consider replacing at 30-40% of replacement cost. Repair history: If this is the first major repair on a well-maintained system, lean toward repair. If it’s the third repair this year, lean toward replacement regardless of cost. Component involved: Some repairs (capacitor, contactor, fan motor) are normal wear items that don’t indicate broader system failure. Others (compressor, evaporator coil) often signal the beginning of the end. The Age Factor: How Old Is Too Old? System age is the second most important factor in your decision. Average HVAC Lifespan National average: 15-20 years with proper maintenance Summerville reality: 12-16 years is more typical Why the difference? Our systems work harder. A Summerville AC runs 8-9 months per year, often 12+ hours per day during summer. Compare that to a system in Minneapolis that might run 4 months per year. More operating hours means faster wear. Age-Based Decision Framework Under 8 years old: Almost always repair unless the cost exceeds 50% of replacement. These systems have significant life remaining. 8-12 years old: Evaluate carefully. Major repairs may be worthwhile, but start planning for eventual replacement. This is a good time to begin saving. 12-15 years old: Lean toward replacement for major repairs. The system is in its final years, and repair money is often better invested in new equipment. Over 15 years old: Replace for any significant repair. Even if the repair is relatively affordable, you’re likely facing additional failures soon. The efficiency gains alone often justify replacement. The Warranty Consideration Most HVAC systems come with: 5-10 year compressor warranty 5-10 year parts warranty 1 year labor warranty (sometimes extended by the installer) If your system is still under warranty, repair almost always makes sense—your out-of-pocket cost is limited to labor and any non-covered parts. Check your paperwork or call your installer to verify warranty status before making any decisions. The R-22 Refrigerant Problem If your system uses R-22 refrigerant (also called Freon or HCFC-22), this single factor may make your decision for you. What Happened to R-22 R-22 was the standard air conditioning refrigerant for decades. However, due to its ozone-depleting properties, the EPA phased it out: 2010: No new R-22 systems could be manufactured 2020: Production and import of R-22 banned entirely This means all R-22 available today is either recycled or reclaimed from decommissioned systems. Supply is limited and shrinking every year. The Cost Impact R-22 prices have skyrocketed: 2010: Approximately $10-15 per pound 2020: Approximately $50-75 per pound 2026: $100-200+ per pound depending on availability A typical residential AC system holds 6-12 pounds of refrigerant. If your R-22 system develops a leak, you’re looking at: Leak repair: $200-$1,000+ depending on location Refrigerant recharge: $600-$2,400+ for a full charge Total cost: Often $1,000-$3,000+ for a single repair And here’s the kicker—if it leaks once, it will likely leak again. You could face these costs repeatedly. How to Know If You Have R-22 Check the data plate on your outdoor unit. Look for: “R-22” or “HCFC-22” = R-22 system (consider replacement) “R-410A” or “Puron” = Modern refrigerant (repair may make sense) If your system was installed before 2010, it almost certainly uses R-22. Systems installed 2010-2015 could be either. Systems installed after 2015 are virtually all R-410A. Our Recommendation If you have an R-22 system that needs any refrigerant-related repair, replace

SCHEDULE A $0 FREE SERVICE CALL AND GET A FREE QUOTE


GET A FREE ESTIMATE and schedule service


GET A FREE ESTIMATE and schedule service