Home of the $0 FREE Service Call | 0% Interest for 24 Months

Home of the $0 FREE Service Call | 0% Interest for 24 Months

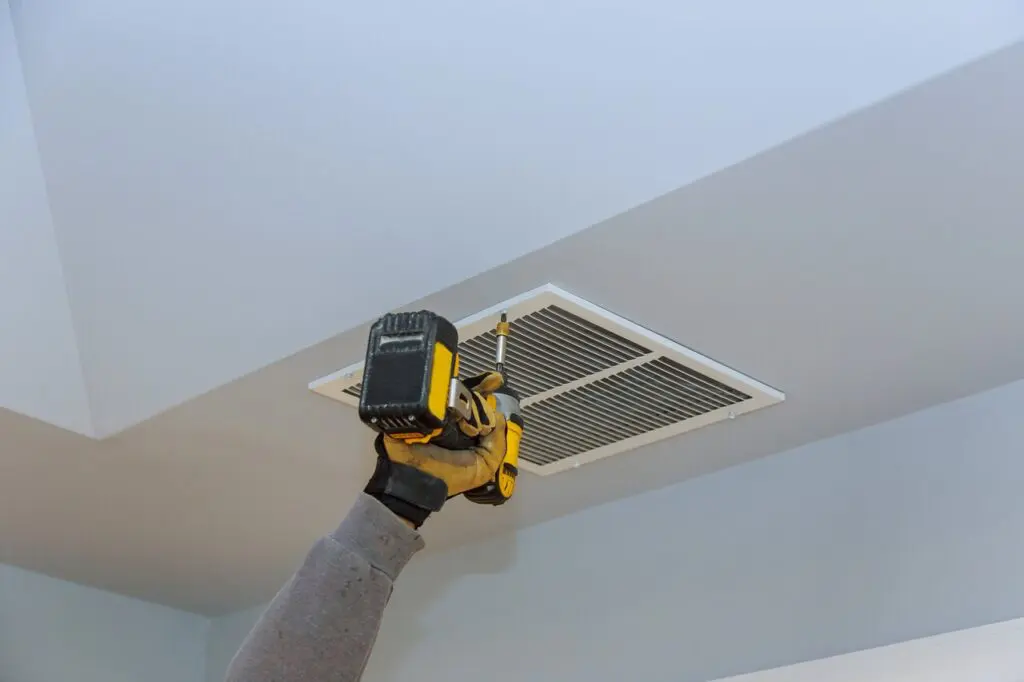
Understanding HVAC Zone Control Systems

HVAC

Trying to keep every room in your house at the perfect temperature can be a challenge, especially when one space always feels too warm while another stays too cold. Whether you’re running the AC during Summerville’s hot summers or using the heat during those cooler evenings, the struggle for consistent indoor comfort is real. That’s where an HVAC zone control system comes in. It offers a smarter way to manage temperatures in different parts of your home without overworking your system. This type of setup gives more control over how each area feels, which can lead to better comfort and fewer arguments over the thermostat. Instead of treating the entire home as one big space, zoning splits it into smaller sections so you can manage each one more precisely. This kind of flexibility is especially helpful in larger homes or in spaces that get uneven sunlight, like a sunroom that heats up faster than a shaded bedroom. What Is an HVAC Zone Control System? An HVAC zone control system is a setup that divides your home into multiple temperature-controlled areas, or zones. Each zone has its own thermostat and temperature settings, allowing one part of the home to be cooler or warmer than the others. All zones are connected and managed through one central control panel. So, how does it all work? The system includes three main components: 1. Thermostats: Each zone has an individual thermostat so the temperature can be adjusted separately. 2. Dampers: These are placed inside your air ducts. They open or close based on thermostat settings to control airflow to different areas. 3. Control Panel: This is the system’s hub. It receives input from all the thermostats and tells the dampers when and where to open or close. Rather than forcing your entire home to one temperature, the system sends hot or cold air only to rooms where it’s needed. For instance, your upstairs bedroom might stay warmer than your downstairs living room. With a zone control system, you can cool the bedroom without chilling the rest of the house. This setup is especially practical for multi-story homes, converted basements, large open floor plans, or rooms with different insulation levels and sun exposure. Benefits of HVAC Zone Control Systems Installing an HVAC zone control system can improve comfort and lower your energy use significantly. When every room gets just the right amount of heating or cooling, your system doesn’t have to run as long or as often to meet your household needs. Here are some key benefits zoning brings: 1. Better comfort: A single thermostat can’t keep every room in your house comfortable at the same time. With zoning, you get targeted temperature control in each area. No more freezing in one room while sweating in another. 2. More efficiency: Your HVAC system no longer pumps air into empty or rarely used rooms. It works only where you want it to, which means less energy is wasted. 3. Longer system lifespan: By reducing the overall workload on your HVAC system, zoning helps lower wear over time. The less your system struggles to meet demand, the longer it’s likely to last. Zoning also helps resolve disagreements over the thermostat. One person’s comfort level might make another person uncomfortable. With zones, everyone can have their preferred settings depending on where they are in the house. Installing an HVAC Zone Control System The process of getting a zone control system involves several steps and a fair bit of technical know-how. For most households, it’s not something to take on alone. Hiring an experienced HVAC company in Summerville is your safest move. Here’s what goes into a typical installation: 1. Evaluate your current system and home layout. 2. Decide where zones should be located. 3. Install thermostats in each zone. 4. Add dampers inside the ductwork. 5. Sync everything to a central control panel. A skilled technician will also make sure the ductwork is balanced and properly sealed. This ensures your HVAC runs smoothly once all the new equipment is in place. While DIY videos might make zoning look simple, the truth is that poor installation leads to air leaks, uneven temperatures, and wasted energy. Professionals have the tools and training to make sure the setup works perfectly from day one. That’s especially important in a humid and warm area like Summerville, where comfort depends on precision. Is an HVAC Zone Control System Right for Your Home? While zoning isn’t a must for every household, it works better in some homes than others. Multi-level homes usually benefit the most. That’s because warm air naturally rises, causing upstairs areas to be hotter than downstairs ones. A zoning system solves this imbalance without overcompensating or overusing the HVAC unit. Zoning may also be right for your home if you have: – Large open spaces – Rooms with high ceilings – Additions or sunrooms – Rooms with lots of windows – People who have different comfort preferences If your HVAC system is fairly new and in good shape, adding a zone control system can give it better performance without needing a full upgrade. However, if your current system is outdated or struggling already, your HVAC contractor may recommend replacing the system before upgrading. You’ll also want to think about how often you use each space. If you spend little time in guest rooms or bonus rooms, there’s no point in conditioning them the same as your main living areas. Making the Most of Your HVAC System in Summerville Once your zoning system is in place, knowing how to take care of it helps you get the most out of your investment. Routine checkups and minor efforts go a long way in maintaining long-term performance. Here are a few tips for keeping your system working strong: 1. Clean or replace air filters regularly. 2. Schedule seasonal tune-ups, especially before summer and winter. 3. Keep vents clear and unblocked to allow easy airflow. 4. Monitor your thermostats and schedules to avoid big energy swings.

How To Tell If Your Air Ducts Are Properly Sealed

Air Duct

If your home never seems to stay at a steady temperature or you’re dealing with sky-high energy bills, the cause might be something hidden right inside your walls—your air ducts. When these ducts aren’t sealed properly, air escapes before it even reaches your rooms. That means your HVAC system has to work harder to keep you comfortable, which ends up costing more and doing less. Summers in Charleston can be hot and humid, and no one wants to deal with rooms that feel stuffy or uncomfortable. Checking whether your air ducts are sealed is one of the simplest ways to improve airflow, boost comfort, and cut down on your HVAC system’s workload. Here are some easy ways to tell if your ducts are leaking and how that might be affecting your home. Signs Your Air Ducts Are Leaking If your air ducts have gaps or loose connections, they can let a lot of air out before it even gets to your living space. That may not sound like a big deal, but it can create all sorts of issues. Here are some signs that your ducts may be leaking: 1. Your energy bill keeps rising When air leaks out of your ductwork, your HVAC system has to run longer to make your house feel cool or warm. That extra run time burns more energy and can make your monthly bills go up without any noticeable benefit. If your usage habits haven’t changed, but your costs have, leaky ducts could be part of the problem. 2. You feel hot or cold spots throughout the house A well-functioning HVAC system should keep the temperature fairly even from room to room. If you start noticing that one bedroom is cooler than the others or your living room feels warmer than your kitchen, it might be a sign that air is escaping from the ducts before reaching certain areas. 3. Indoor air feels dusty or stale Leaks can let dirty air from places like attics or crawlspaces mix with the clean, conditioned air inside the ducts. That means more dust, allergens, or even smells can be circulated through your home, especially when the system kicks on. If more frequent dusting or sneezing has become the norm, it’s worth checking the ductwork. One homeowner in Charleston told us the upstairs rooms were always warmer than downstairs, no matter how low the thermostat was set. After a professional inspection, they found that a few poorly sealed ducts in the attic were letting cool air escape before it reached the top floor. Once those spots were sealed properly, the difference was immediate—better airflow, even temperatures, and a noticeable drop in the monthly utility bill. Visual And Physical Inspections You don’t always need special equipment to figure out if there’s a leak. Sometimes just using your eyes and hands can point you in the right direction. Too many homeowners overlook these simple checks, even though they can tell you a lot about how your air is moving. Start by inspecting any exposed ductwork you have access to. This might be in your attic, basement, or crawlspace. Here’s what to look for: – Loose joints or disconnected sections – Gaps where duct pieces meet – Flex ducts with tears or crumpled areas – Old or dried-out tape around seams Look closely at any areas where the ducts change directions or branch out. These angles are common weak points where leaks happen. Next, run your HVAC system and let the air start flowing. Slowly move your hand along the seams and edges of the ducts. If you feel air blowing out where it shouldn’t be or hear any kind of whistling noise, that’s a pretty good sign of a leak. Even though this kind of inspection is basic, it can still give you a good idea if something’s clearly wrong. If you don’t see anything obvious but are still having comfort or airflow issues, that’s usually when it makes sense to bring in a professional for testing. Some leaks are small or hidden in parts of the system you just can’t reach easily. Professional Methods For Detecting Leaks While a quick inspection can highlight obvious problems, some duct leaks need a more thorough approach to pinpoint accurately. Professionals use advanced tools and methods to find and measure leaks, making sure nothing slips through unnoticed. The duct blower test is a common technique used in this process. It involves sealing off the registers and supplying the duct system with a calibrated fan. By doing this, technicians can detect the amount of air leakage within the system. This method quantifies the leak level, giving a clearer picture of how much air is escaping. Infrared thermography offers another detection method. It uses thermal imaging cameras to spot temperature differences in ductwork. These cameras can see areas where air might be escaping because they appear warmer or cooler than the rest of the ducts. This visual aid helps technicians identify and address leaks much more accurately than by sight alone. Using these methods, experts can provide a comprehensive leak survey for your home. This thorough analysis ensures no issues go unnoticed, creating a solid plan for repairs that improve your HVAC system’s overall performance. Benefits Of Proper Air Duct Sealing Making sure your air ducts are sealed correctly can seem like a small task, but it comes with plenty of benefits. When ducts are well sealed, your HVAC system can do its job more effectively. One of the main perks is better energy efficiency. When air isn’t leaking out, your HVAC system doesn’t have to work overtime to maintain a consistent indoor temperature. This helps reduce energy use over time, which usually shows up as lower monthly bills. You’ll also enjoy more consistent indoor comfort. With fewer leaks, air flows through the system as intended, making sure every room gets the same level of conditioning. No more cold spots in one room and warm patches in another. On top of that, sealed ducts

Signs Your Heat Pump Needs Professional Attention
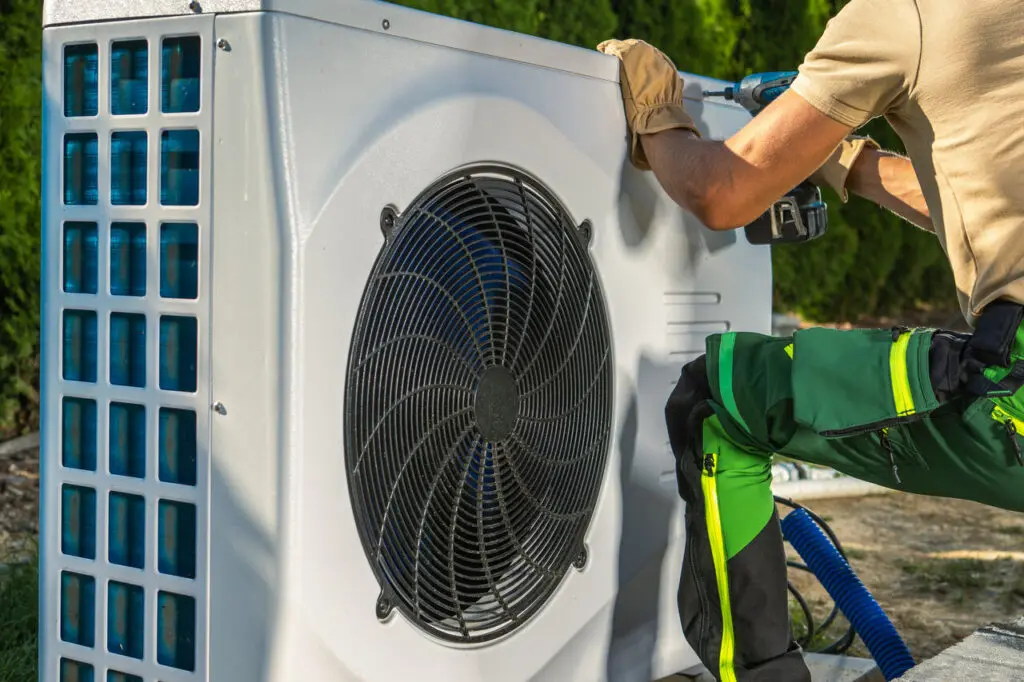
Heat Pump

When the heat and humidity of a Charleston summer settle in, your heat pump becomes a key part of keeping your home livable. Even though most of us don’t give it much thought, your heat pump is working behind the scenes every day to make sure indoor temperatures stay comfortable. So when something goes wrong, it doesn’t take long to notice how important it is. The trick is knowing the early signs that your system might be struggling. Many homeowners wait until their heat pump completely stops working before calling for help. But catching small issues early can help you avoid bigger problems and more expensive repairs. Here’s what to look out for so you don’t get left sweating in the middle of June. Unusual Noises Your heat pump should run with a low, steady hum. If you start hearing sounds that stand out, it’s usually a red flag. New or loud noises can mean something’s gone out of line or a part is wearing down in a way it shouldn’t. Here are a few sounds that suggest it’s time to bring in a pro: – Grinding or metal-on-metal noises could mean the motor bearings are worn out. – Buzzing might come from loose parts or a failing electrical component. – Rattling often points to a loose fan blade or a part that’s out of place inside the unit. – Hissing may suggest a refrigerant leak, especially if paired with weak airflow. We once had a customer in Charleston who ignored a high-pitched squeal coming from their outdoor heat pump for weeks. It turned out the blower motor was close to burning out. If it had been left alone any longer, it would’ve taken the whole system offline in the middle of a week-long heat wave. Don’t let it get that far. Even if the heat pump’s still doing its job, these sounds usually mean something inside the system isn’t working like it should. A technician can catch the issue early and help you avoid costlier damage down the road. Inconsistent Heating Or Cooling A properly running heat pump should keep your home at a steady temperature. If you’re feeling cold spots or your rooms aren’t cooling down like they used to, your system might not be working at full strength. Other signs to look for include: – The system runs constantly but still doesn’t reach the temperature set on your thermostat. – Airflow feels weaker than usual. – The unit switches between heating and cooling oddly or at less-than-ideal times. These problems may be caused by low refrigerant levels, a struggling compressor, or a blocked air filter. Thermostat troubles can also throw things off. No matter the cause, this kind of issue isn’t something that magically fixes itself. Charleston’s climate can make these signs show up fast. With high humidity and outdoor temps climbing into the 90s during June, your heat pump has to work harder. If it’s already under pressure, now is the time to act, before it stops working completely on the hottest day of the year. Higher Energy Bills Have you opened your utility bill and noticed a spike even though you’re not using more power than usual? That’s a pretty common sign that your heat pump isn’t working efficiently anymore. When it has to work overtime to keep up, it burns more energy, which means higher bills for you. There are several reasons this could be happening. A dirty filter can block airflow, forcing the system to push harder than necessary. Malfunctioning parts like the compressor or leaks in the ductwork can also ramp up energy use. These are warning signs that shouldn’t be shrugged off. A qualified technician can inspect the system and get to the root of the problem. Waiting too long often means more stress on the system and more money wasted in the process. Frequent Cycling If your heat pump seems to be turning on and off more often than usual, this could be a sign of short cycling. Aside from making your home less comfortable, short cycling wears your system out quickly and can lead to bigger issues down the road. A few things could be causing this. A thermostat sending mixed signals can confuse the system, leading to frequent shut-offs and restarts. If the refrigerant is low or a filter is clogged, the heat pump may keep restarting to adjust for the airflow imbalance. In other situations, this behavior might point to wiring problems, a failing blower motor, or even a unit that’s not the right size for your home. Short cycling might not seem like a major issue at first, but the longer it goes unchecked, the more damage it can cause. It’s much better to let a professional troubleshoot it now rather than risk a full breakdown later. Lack Of Regular Maintenance Looking after your heat pump isn’t just for when things go wrong. Regular maintenance keeps it running at its best and helps catch small issues before they turn into bigger headaches. When technicians perform maintenance, they check refrigerant levels, clean out dirty filters, test system operation, and look for signs of wear or damage. They may also recalibrate your thermostat or check airflow balances throughout your home. Skipping regular maintenance causes systems to struggle more than they should. Not only does this shorten the life of your heat pump, but it also increases the odds of a mid-season breakdown. Having a professional take a look once or twice a year is an easy way to protect your comfort, keep energy bills steady, and make sure you’re not caught off guard when Charleston’s weather swings from one extreme to the next. Staying Ahead of Heat Pump Trouble Your heat pump does a lot more than you think—until it doesn’t. Whether you’re hearing strange noises, noticing uneven temperatures, or getting surprised by higher utility bills, these are all signals that your system could use a professional checkup. Recognizing and responding to these signs early makes a

Why Does My AC Unit Smell Like Mildew?
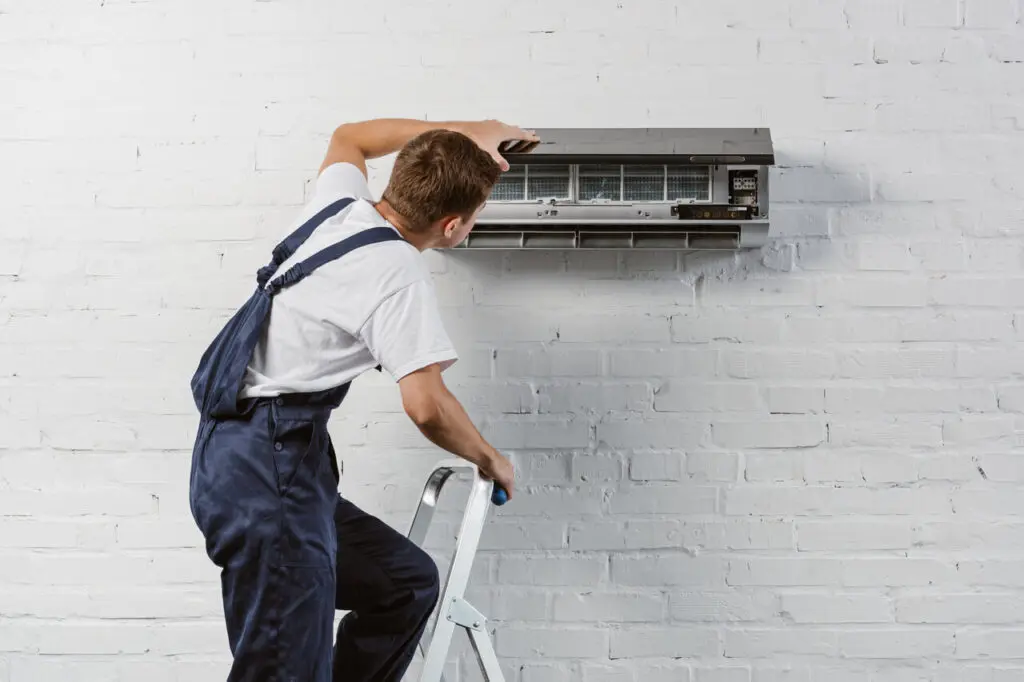
AC

If your AC kicks on and the air smells like mildew, you’re not alone. That musty scent can creep up without warning and turn a relaxing summer day in Charleston into something unpleasant. While the cool air may still be blowing, that smell is a sign something’s not quite right inside your system. The last thing you want is to spend all summer wondering if your AC is blowing mold around your home. Charleston’s hot and sticky summers don’t help either. Moisture builds up faster, and it’s the perfect setup for mildew and mold to grow deep inside your air conditioning unit. A fresh-smelling home starts with clean air, so it’s important to figure out where that smell’s coming from before it blows across every room in your house. Common Causes of a Mildew Smell in Your AC Mildew smells in AC units usually mean one thing: moisture is hanging around where it shouldn’t be. This damp environment is perfect for mold and mildew to grow, and once it starts, it’s hard to ignore. Here are some of the most common reasons your AC might smell like mildew: 1. Standing water in the drain pan – Your AC pulls moisture out of the air, and that water usually drains into a pan and out of your home. But if the pan gets clogged or overflows, water sits still and mildew can start growing fast. 2. A dirty air filter – Filters are meant to trap dust, debris, and moisture. When they get dirty and stay moist, they can become breeding grounds for mildew and end up spreading that musty smell throughout your house. 3. Clogged or moldy ducts – Ductwork can collect dust and moisture over time, especially during humid months. A small leak or crack can let in more moisture or even create a cool, dark home for mold. 4. Blocked condensate line – This pipe helps push water from the AC outside your home. Once it gets clogged either by algae, dirt, or general buildup, water backs up, leading to foul smells or even leaks. 5. Low refrigerant levels – These may not seem connected to smells at first, but if your system isn’t cooling properly, humidity may not be removed efficiently, giving mold more chances to grow. If your AC smells off and you’ve noticed more humidity in your home or damp spots near the vents, it’s likely one of the reasons above is the cause. These issues usually get worse if left unchecked and can spread mildew smells to every room. Health Risks Associated with Mildew in AC Units It’s not just about a funky smell. When mildew builds up inside your air conditioning system, it can push more than cool air into your home. Mold spores and mildew particles can circulate through your ducts and end up in your lungs. That’s not something to take lightly, especially for kids, older adults, or anyone with allergies or breathing issues. Here’s what mildew in your AC could mean for your health and comfort: – Triggering allergy-like symptoms, such as sneezing, itchy eyes, or runny nose – Aggravating asthma or other respiratory conditions – Causing headaches or breathing difficulties when exposed frequently – Making your home smell stale or damp, which can lead to stress and discomfort Even if you’re healthy, breathing in mold spores every day isn’t good for your body. Over time, constant exposure can wear down your immune system and leave you feeling tired or congested without knowing why. Let’s say you turn on your AC in early June, and the smell is strong and sour. You brush it off at first. A few days later, you notice your throat feels scratchy more often and your nose is running when you’re indoors. It’s easy to ignore the connection, but that mildew could be the root cause. That’s why dealing with the smell sooner instead of later matters. If left unhandled, it affects more than just your comfort. It could impact your overall well-being over the summer months. How to Address and Prevent Mildew Odors Dealing with a mildew smell in your AC requires a few targeted steps. Jumping on the problem early can make all the difference in keeping your air fresh and breathable. Here’s how you can tackle mildew odors and stop them from jumping back: – Clean the AC unit: Start by addressing the obvious spots. Clean or replace the air filter to ensure it’s not harboring any mold or mildew. Next, clear the drain pan and condensate line to prevent water buildup. If you feel handy, check the inside of your ducts and gently clean any grime that has collected. – Schedule regular maintenance: Keeping a regular maintenance schedule for your AC is like giving your unit a check-up before things get out of hand. Professional inspections catch small problems before they snowball into bigger ones, ensuring everything runs smoothly without hidden moldy surprises. – Maintain a dry environment around your unit: Moisture is a mildew magnet, so keep the area around your AC as dry as possible. Make sure nothing clogs the drainage paths and place the unit in a spot with good ventilation. When doing yard work, keep excess grass or leaves away to prevent them from dampening things up. Dehumidifiers can also help in particularly muggy areas of your home. One practical example would be cleaning or replacing filters with the change of seasons. Just like swapping out your wardrobe, moving from winter to summer, or vice versa, a fresh filter can improve air quality without extra odors sneaking in. Signs You Need Professional Help Not every problem is a quick fix. Sometimes, the issue is more than grime or basic wear and tear. Here are signs that it’s time to call in the experts: – Odors persist after cleaning: You’ve given the unit a good cleaning, yet that musty smell lingers. This suggests there might be a larger problem lurking deeper inside your system. – Recurring mildew